4. Fab tools#
I explored some of the FabLab’s tools such as laser cutting and 3D printing for repair. Here is a glimpse of my adventure with those.
3D printing for repair#
Repair cafés#
The idea is to meet up, learn and fix your objects with the help of volunteers.
To understand why repair matters, here is a timeline :
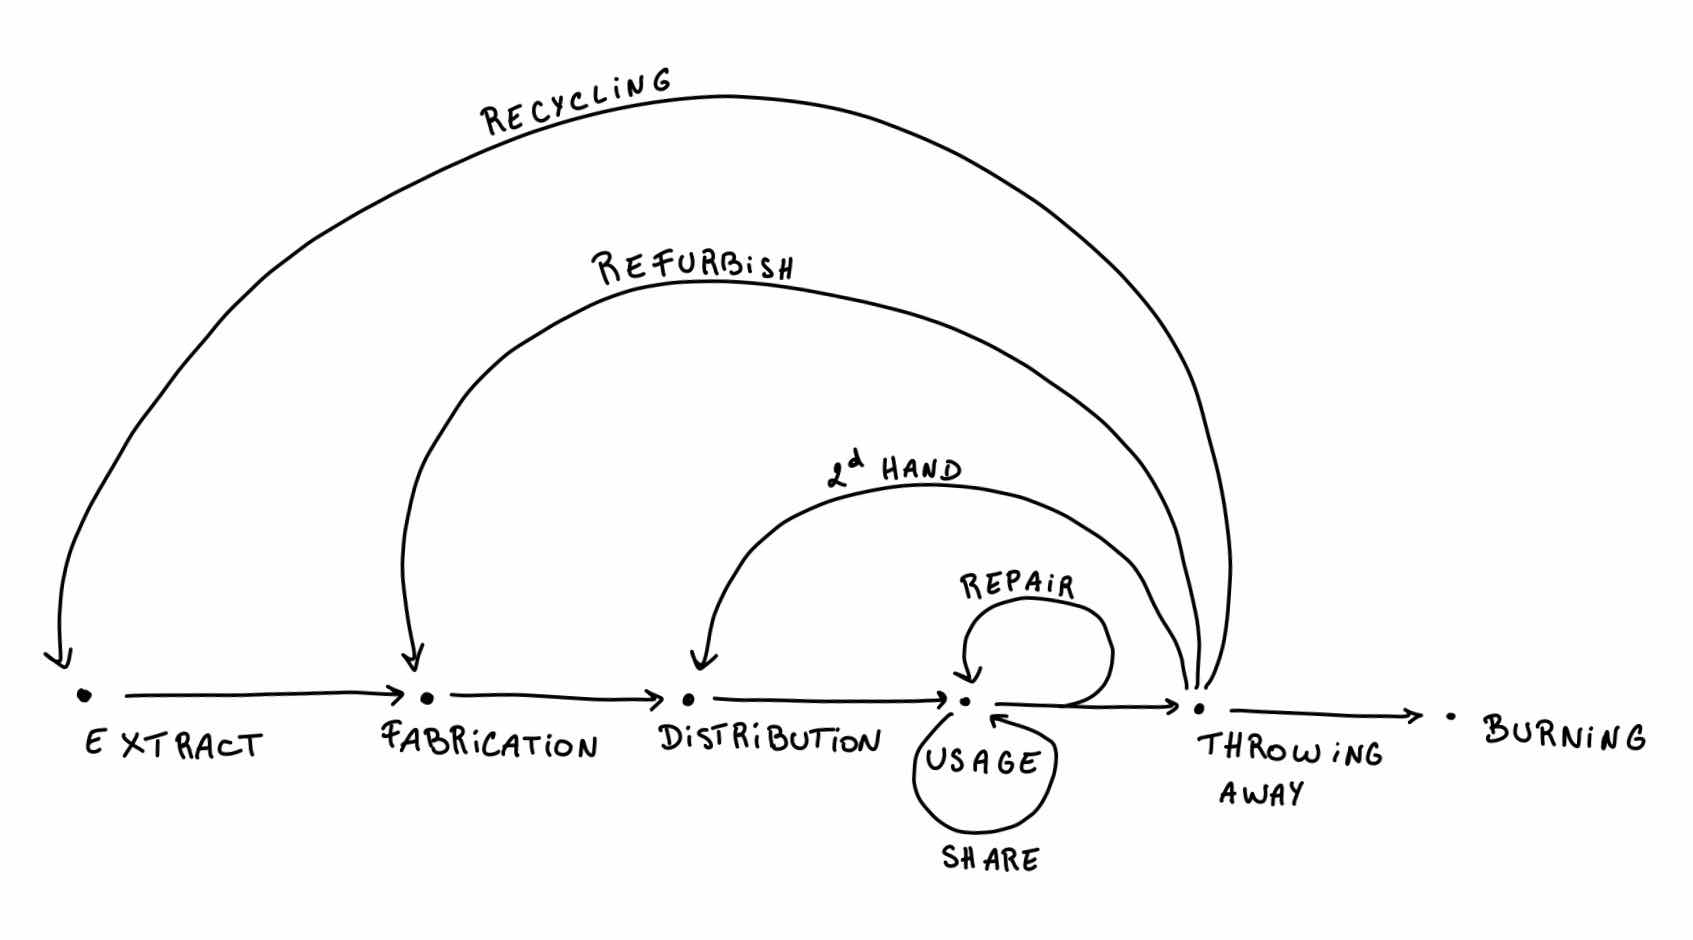 The longer the line, the more energy you need in the process of reusing the object.
→ Repairing is perfect for extending the life of your object without wasting ressources
→ Sharing is great in theory but sometimes it is not possible
Problem solving#
practice 1 : repairing an electrical circuit#
You can check if a wire works with a multimeter, just use the functions voltmeter for the energy and the bip for the battery.
I checked in this order :
- cables : ok
- battery : ok
- switch : ok
- lamp : not working so I changed it
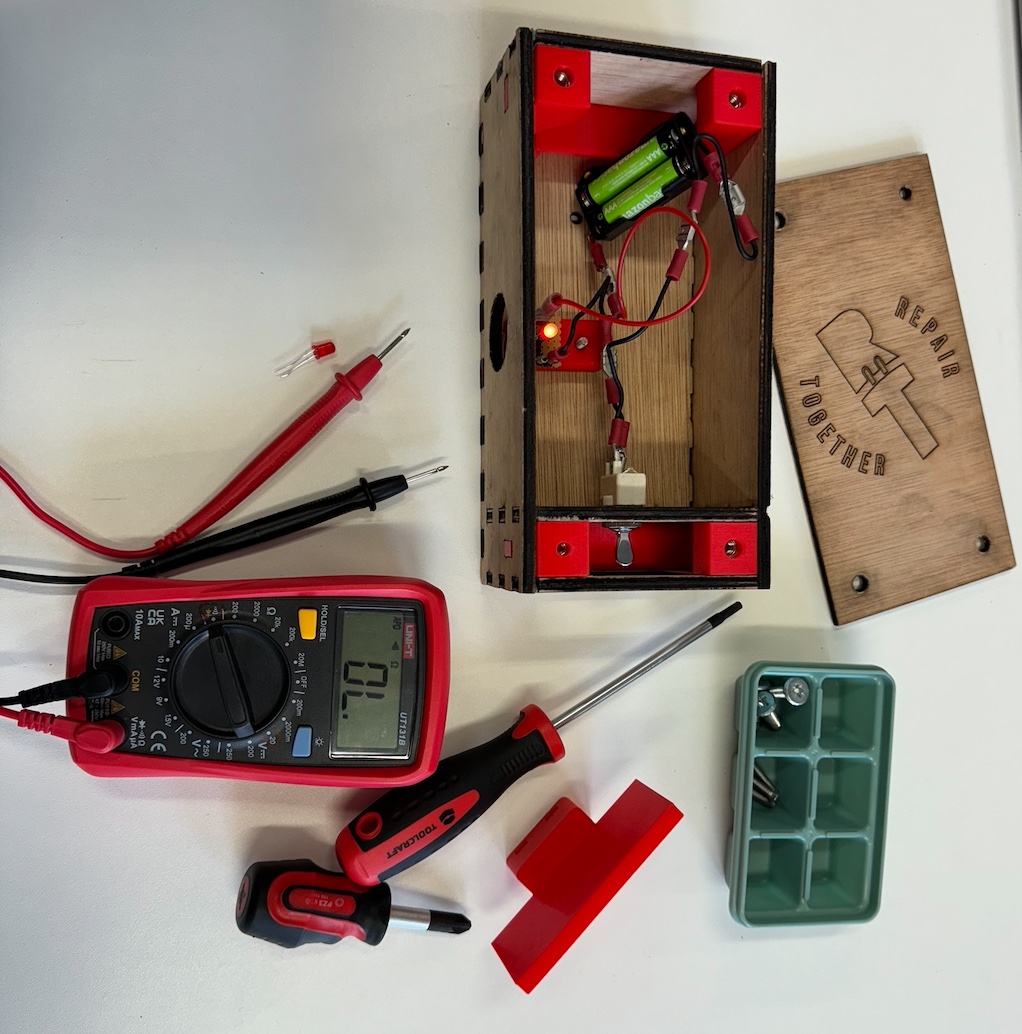 What did I learn?
- Safety first : always remove the battery before you start working to avoid the danger of high voltage.
- Be specific : approching a problem one step at a time to locate the problem easily.
Practice 2 : components#
Then we learned about the different components.
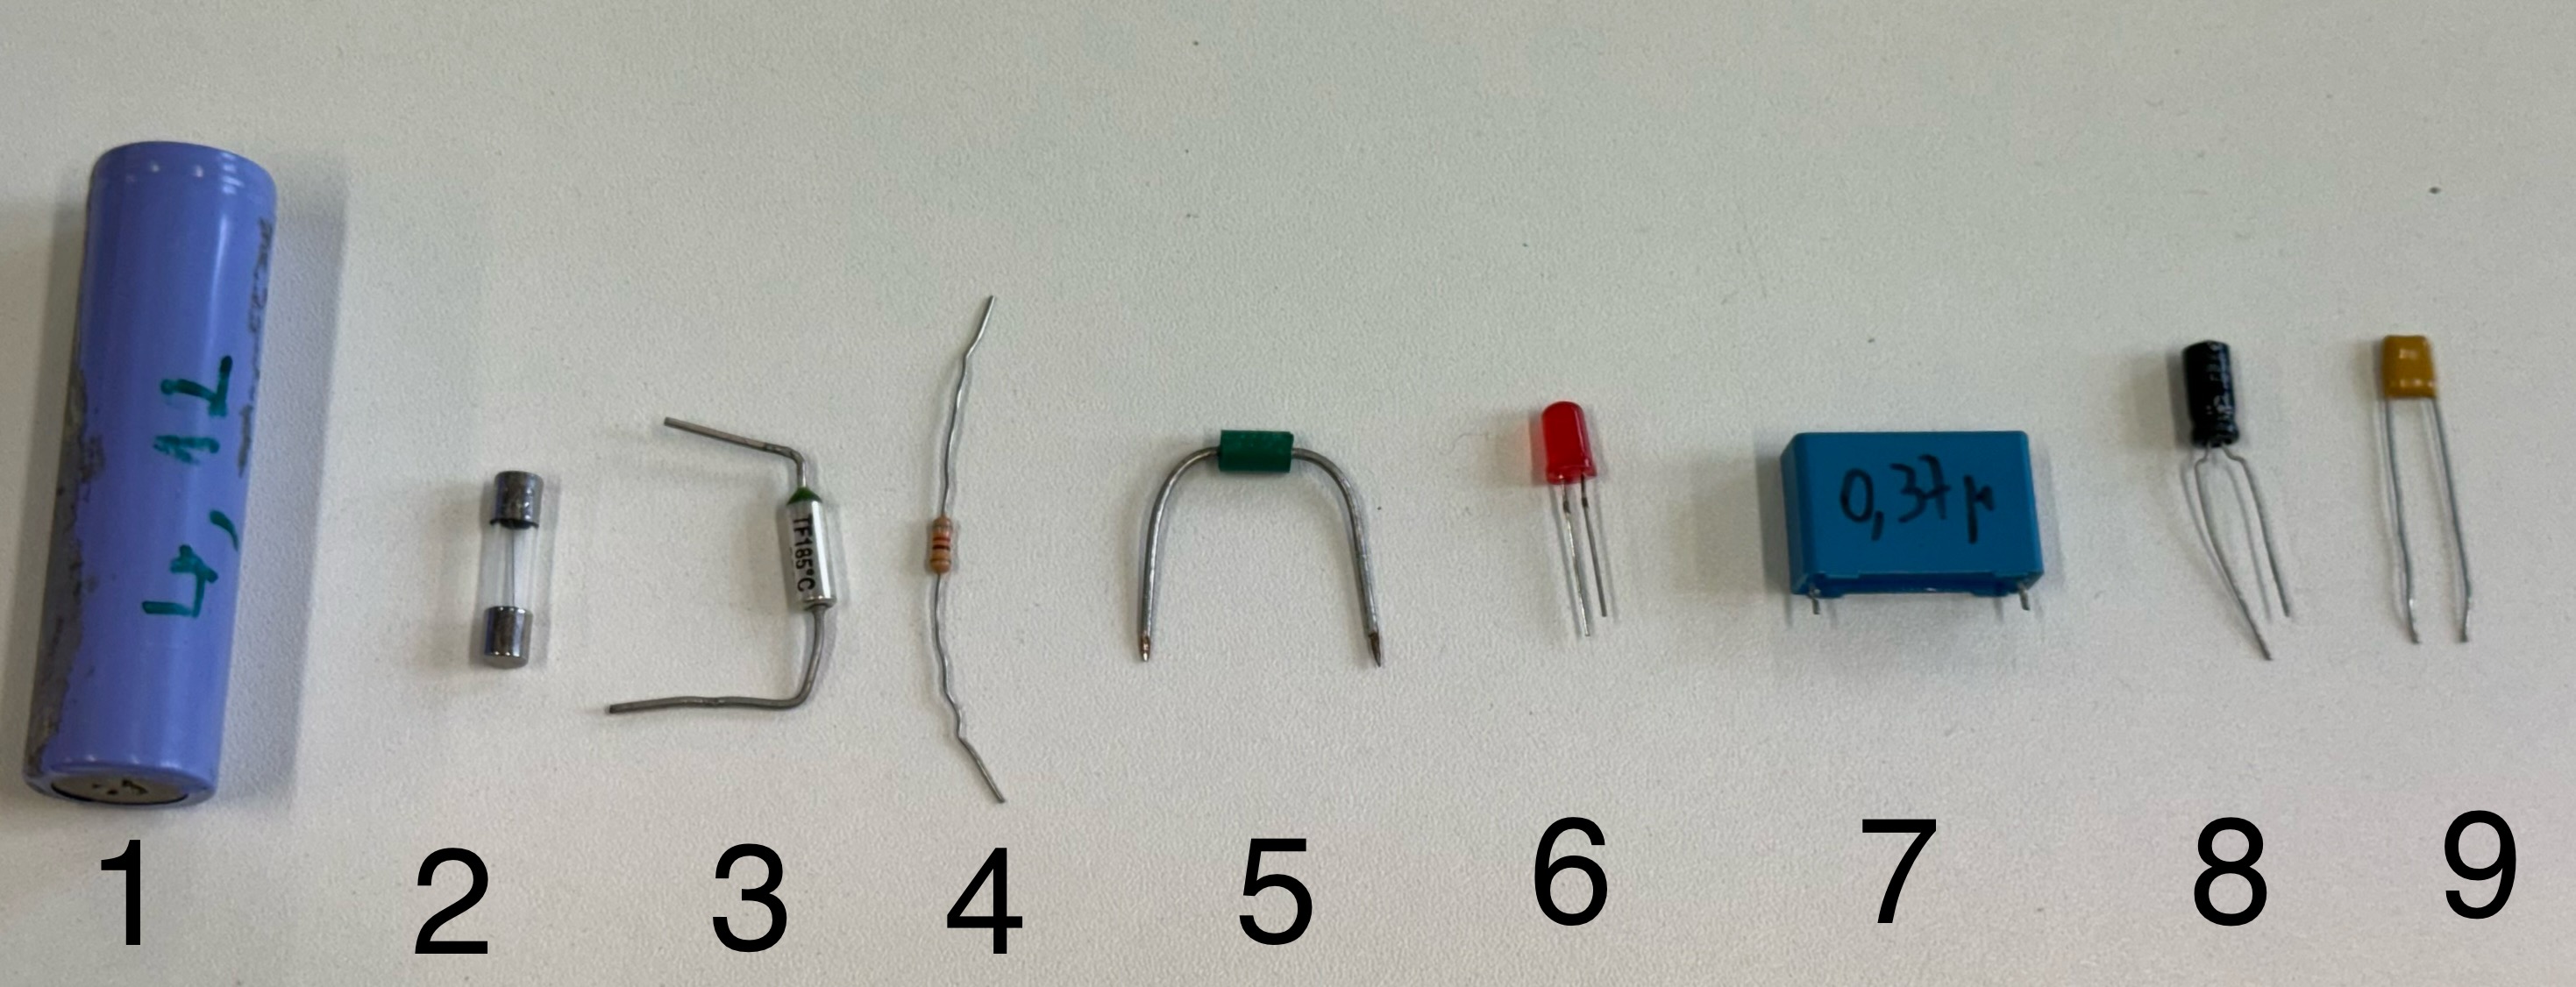
- lithium battery
- electrical fuse
- thermal fuse
- resistance
- diode
- led
- capacitor
- capacitor
- ceramic capacitor
Repairing#
Here is a great guide to work step by step.
The main steps are :
- Analyse
- (Re)conception
- Manufacture
- Testing (quality, weight,…)
My repaired piece#
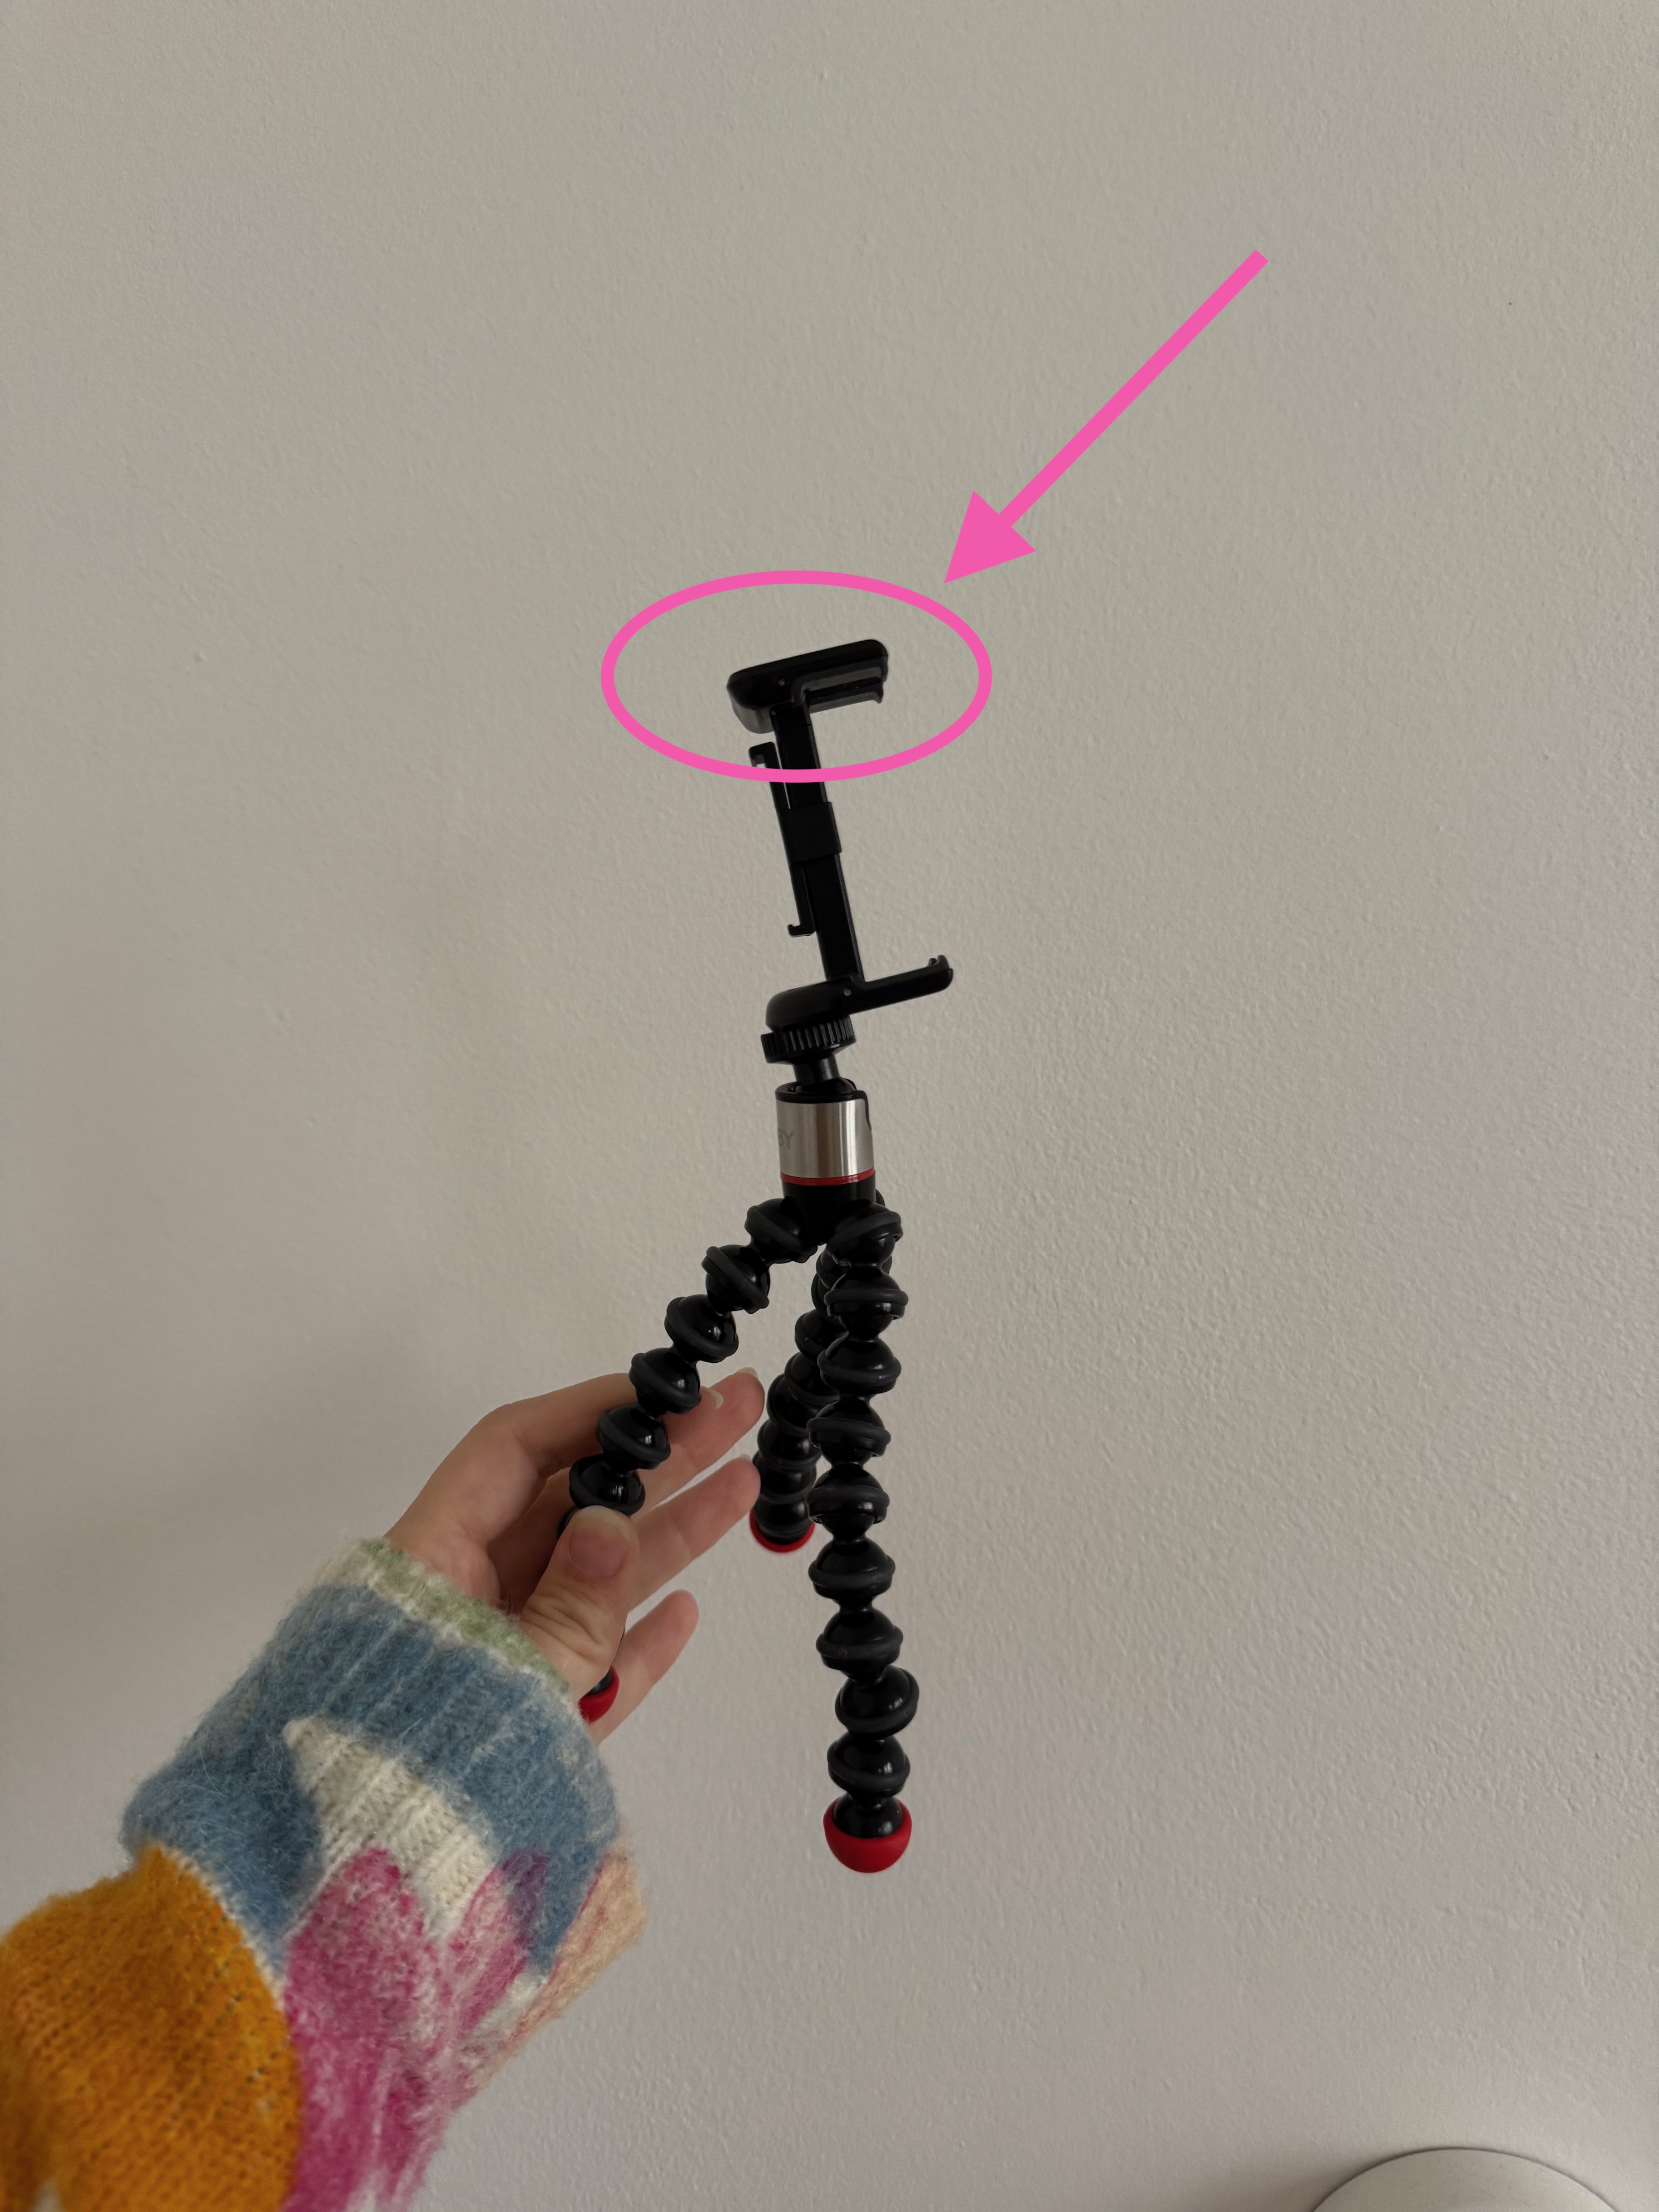
I didn’t have anything broken but I love taking pictures and most of the time that requieres a tripod so in a group of 2, we decided to design the upper piece of my tripod.
-
Measuring
Precision was key. We measured every side of the piece, made a sketch and calculated where the holes should be.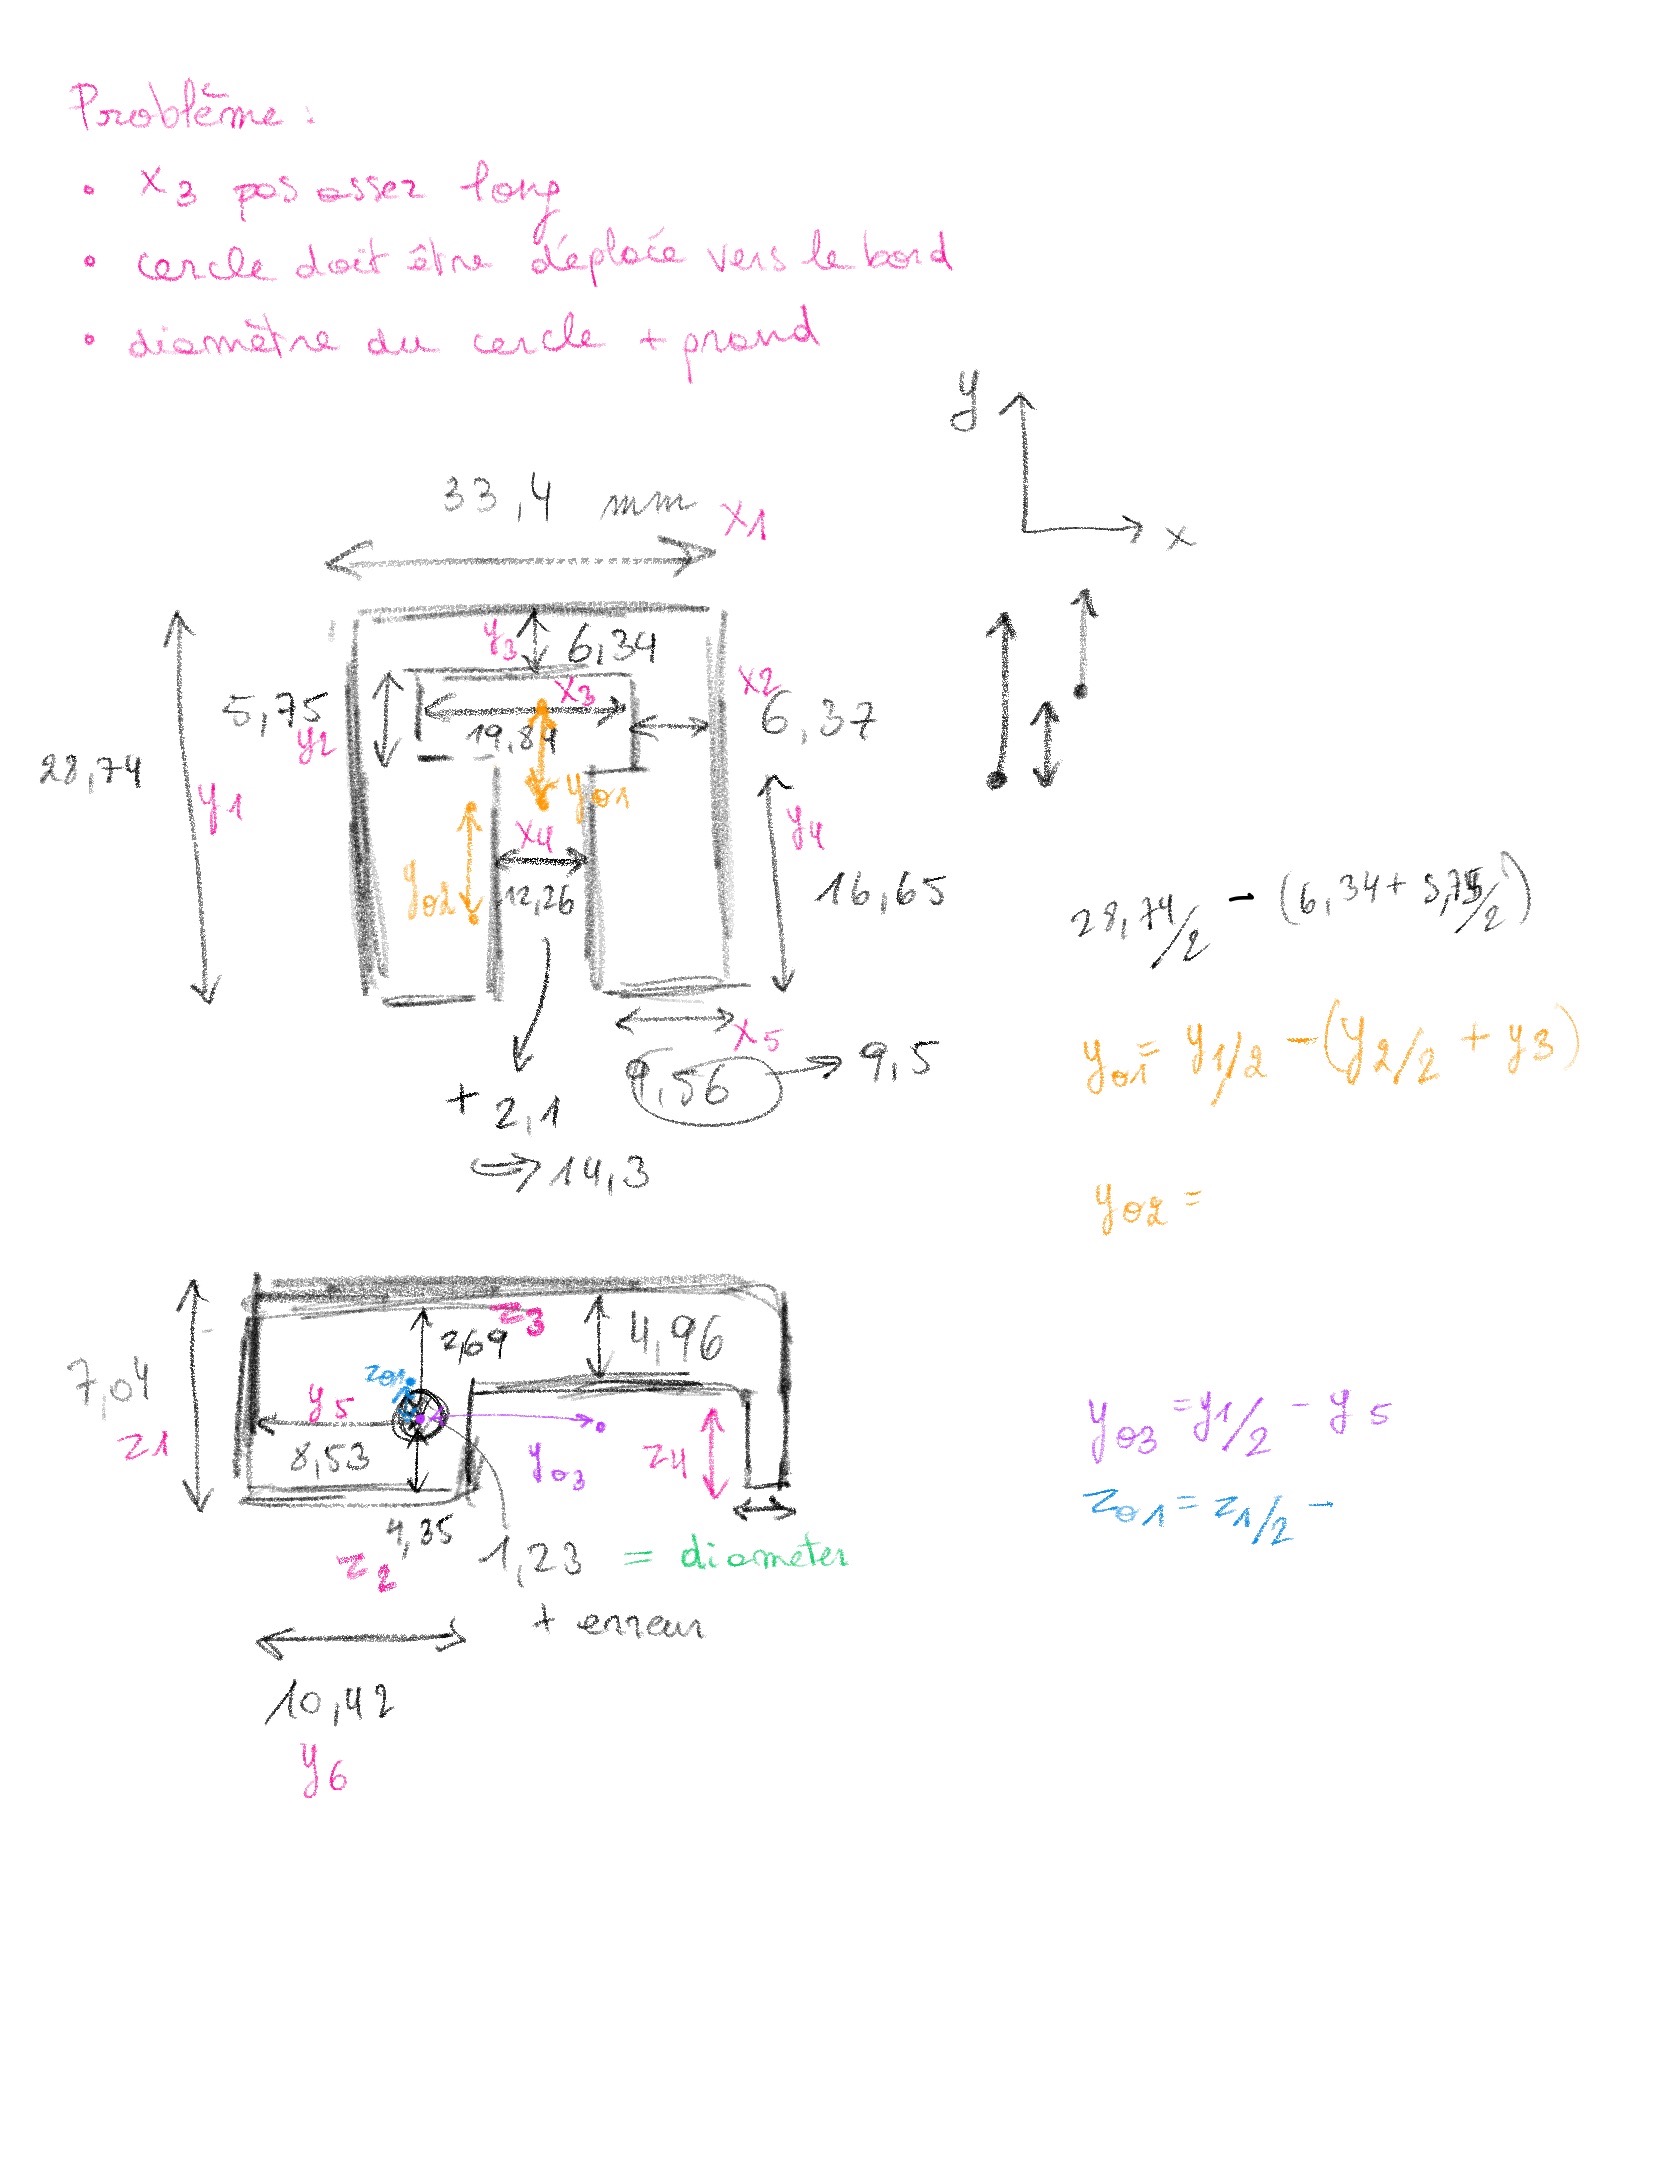
-
Designing
Using Openscad (go to module 2 for more informations about that), we designed the piece :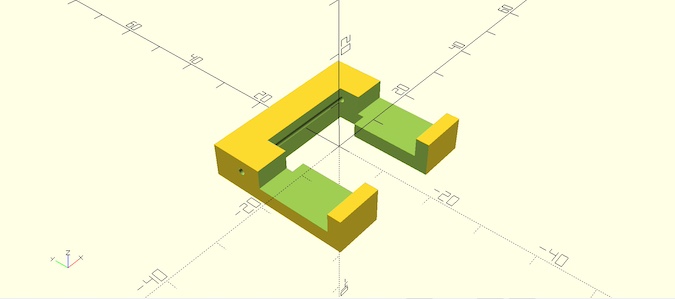
-
Printing and testing
Our printed piece looked promising
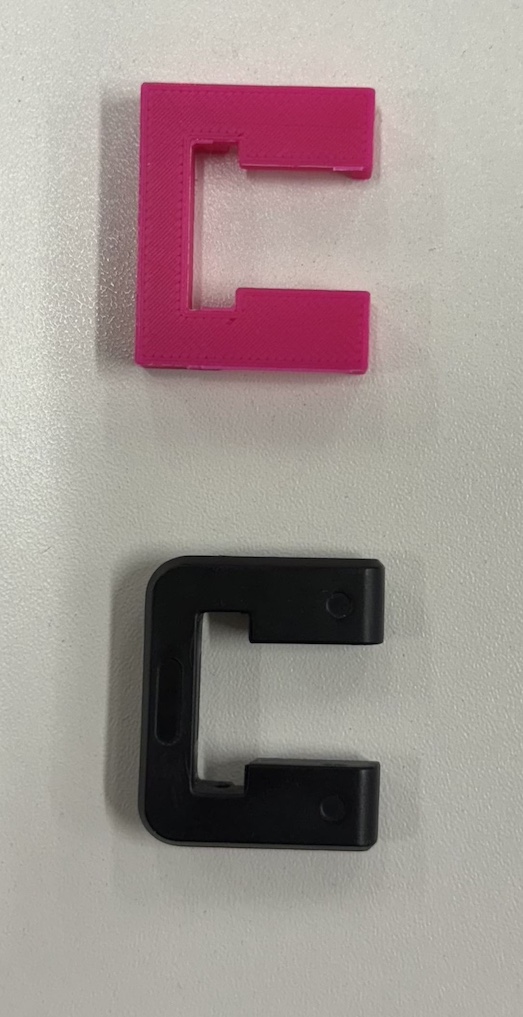
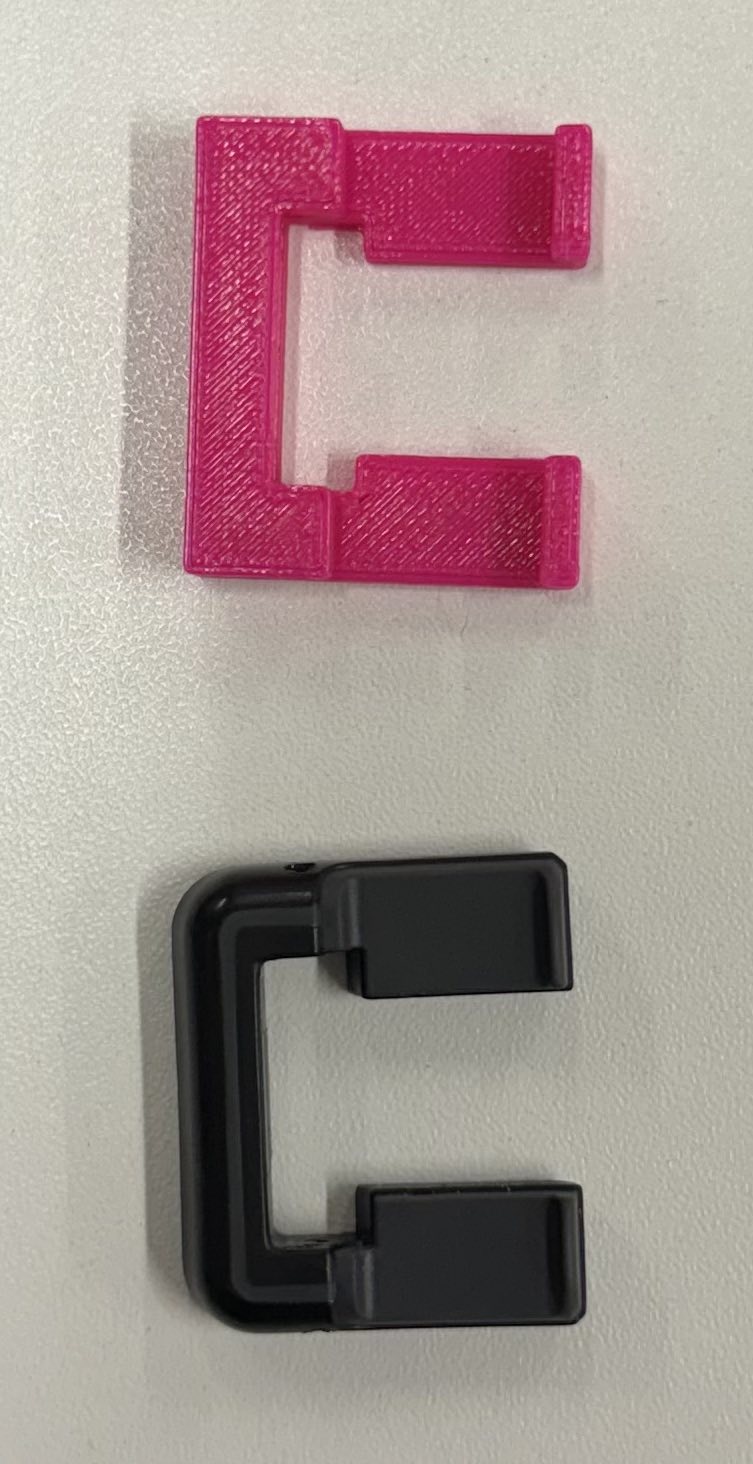
but we discovered a few flaws :
- the length (x3) is not long enough
- the cicrle has to be translated towards the edge
- the diameter of the circle has to be bigger
Sadly, we ran out of time to reprint, but it was a great learning experience!
Computer Controlled Cutting (CCC)#
Using InkScape#
First stop : Inkscape
It is an open-source vector graphics editor used for creating illustrations, logo and designs. It works with vector files (.SVG)
Here are some tutorials to get started.
Laser cutting#
In the Fablab, there are 2 types of CCC :
Lasersaur#
Here you’ll find all the informations you need but I’ll quickly go through the basics.
Before using it, don’t forget these safety steps :
- know the material you are going to use
- turn on the cooler
- open the compressed air valve
- Turn on the smoke extractor
- Locate the emergency button
- Have a fire extinguisher nearby (just in case)
Open it and adjust the focus with the little support (here it was 15mm). Next to the “run button”, you can see where the cut will be to place your material.
There are 2 things to choose once the design is on the app, first select a color then :
- F = cutting speed
- % = power
To ingrave, click on fill → click on the path (color) → + → add the fill
Epilog#
I didn’t have the chance to try the Epilog, it was just always booked and during the formation everyone was using it. :( (But at least it’s a good reason to come back to the FabLab!)
Exercice 1 : The house#
The goal of this exercice is to understand the forces of the machine. Depending on the laser’s speed and intensity, cuts can range from delicate to through the material.
Here is an example with some kind of cardboard.
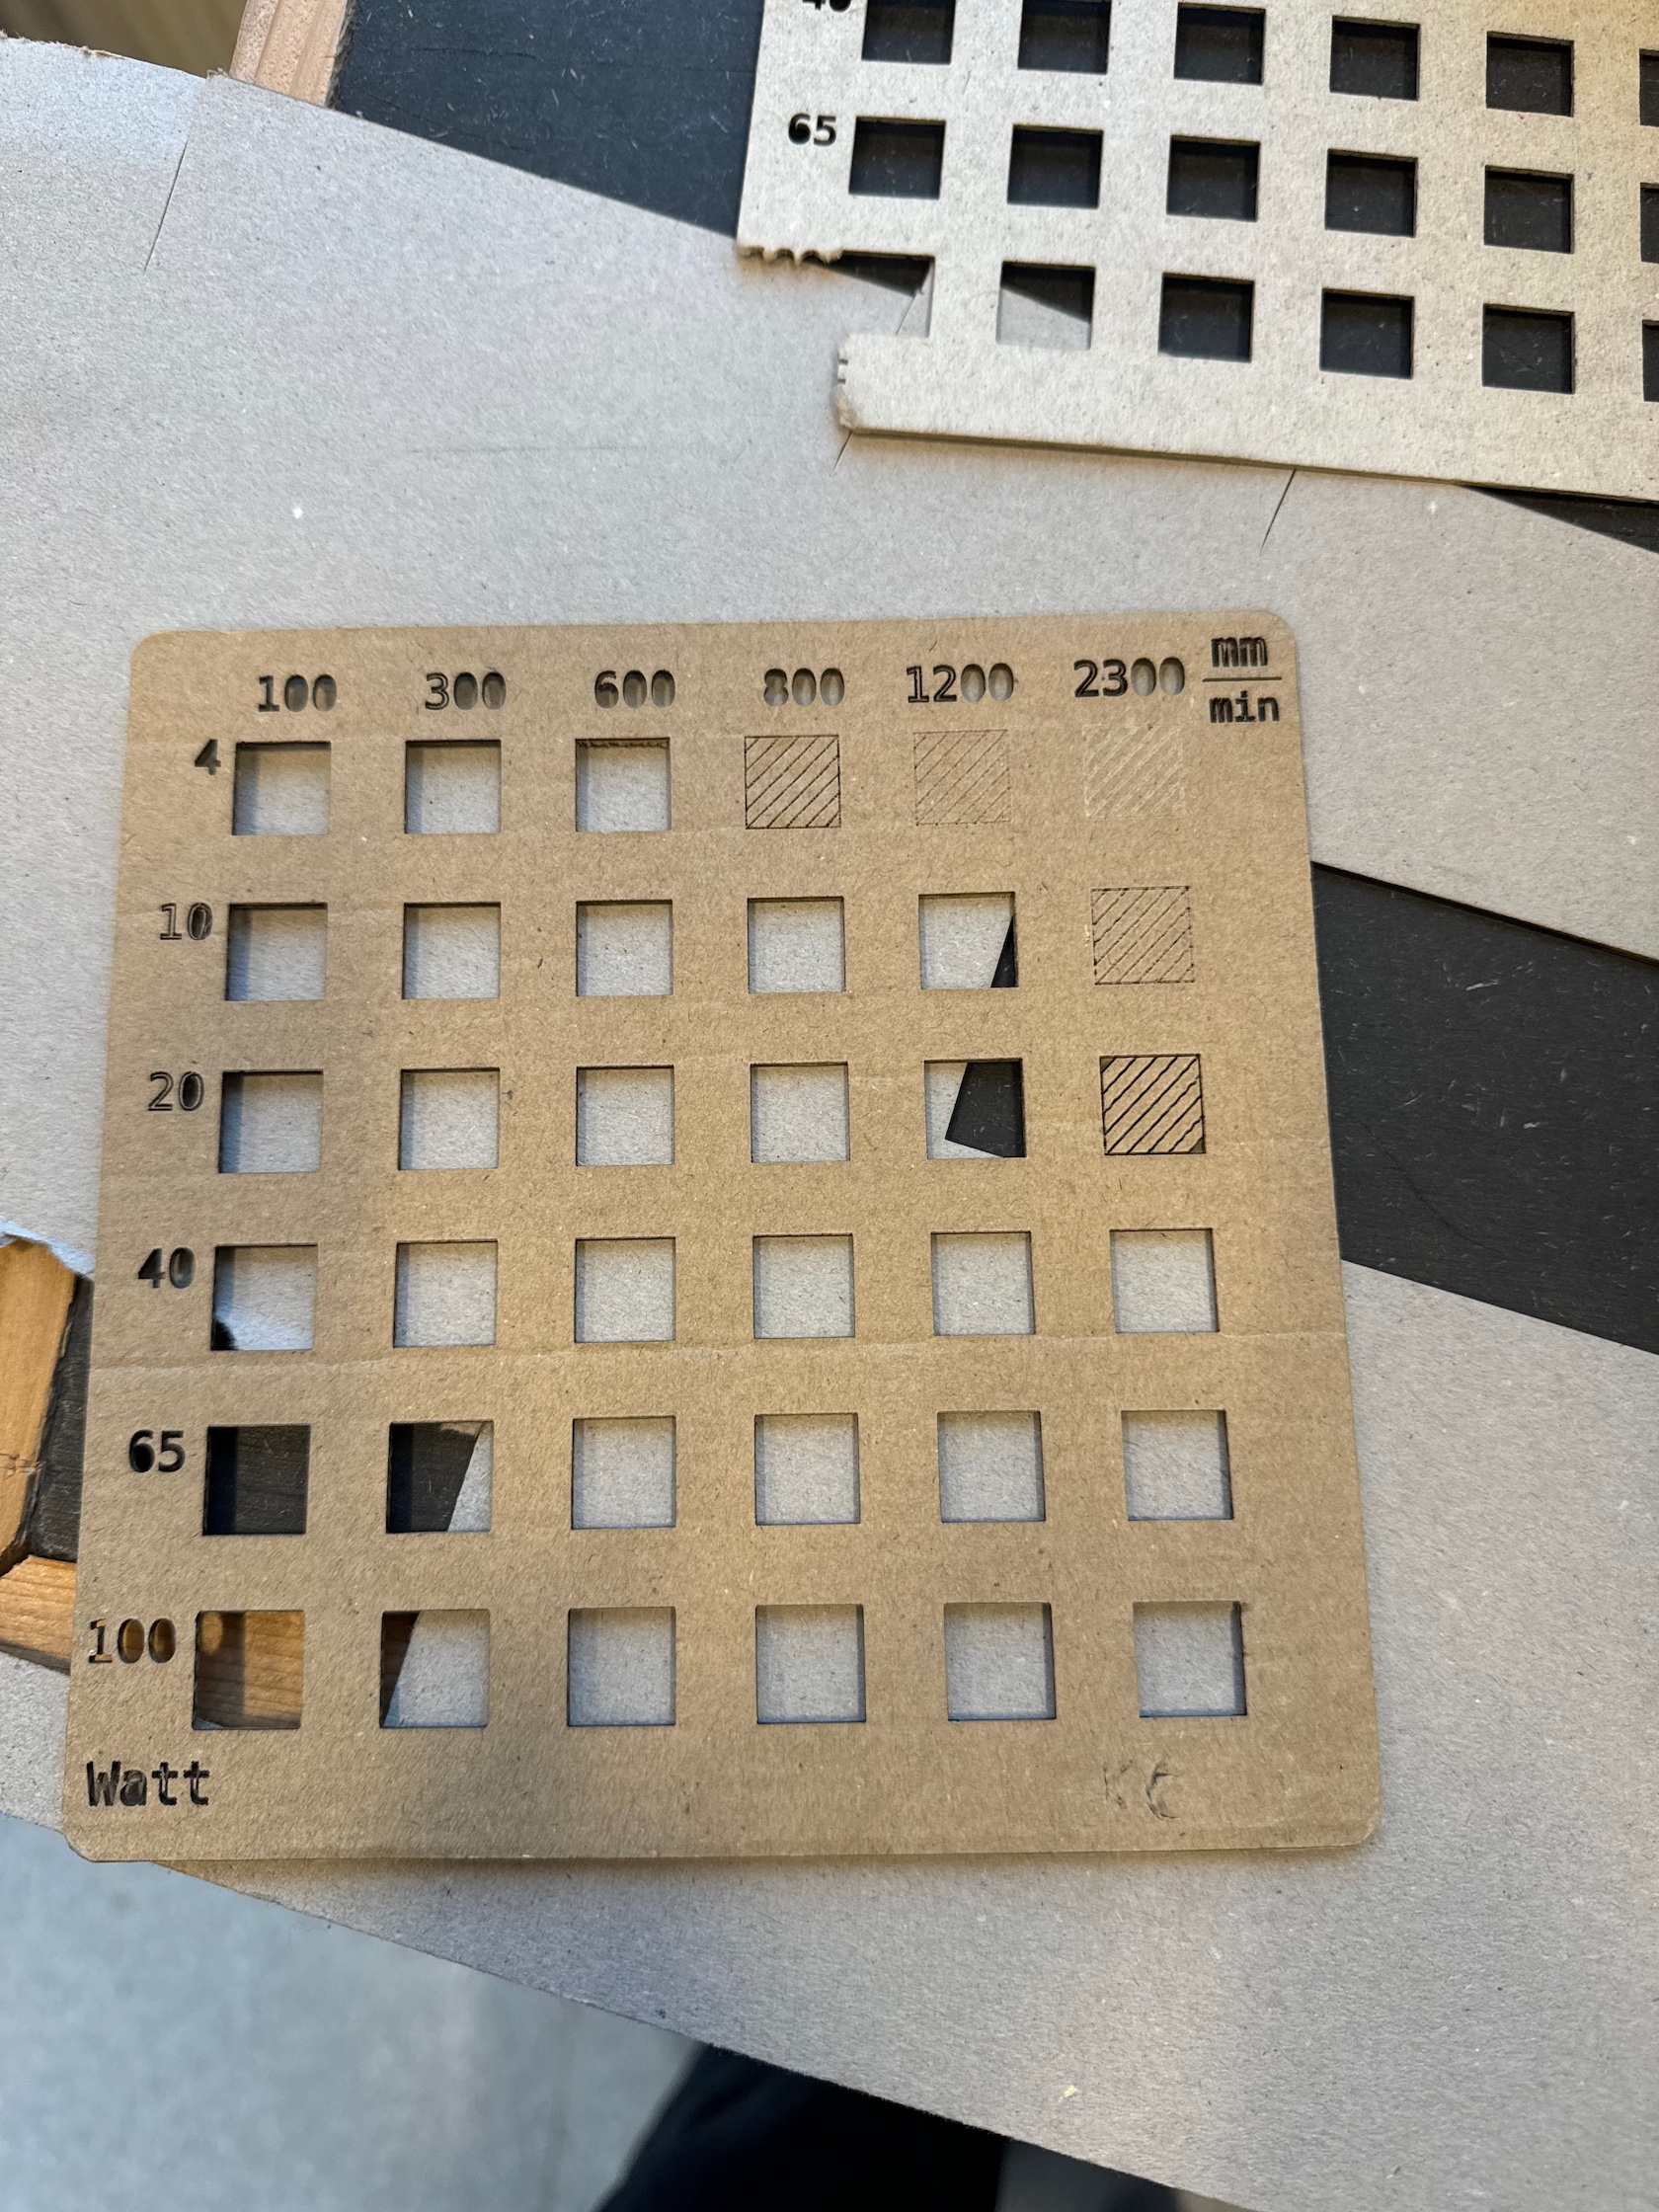
I changed the colors of this”.svg” file with Inkscape


I tried different measures but the colors were not totaly right so somethings it ended up cut and other engraved but it wasn’t exactly what I thought it would be.
So here is my little house :
Exercice 2 : the line#
In groups, we designed a line, but there were some problems with the machine and with the design so the end result is not good:(
The goal was to characterize the lasecutter’s focus, power, speed, kerf and joint clearance.
Here is the design we wanted to cut :

and here is what we got :
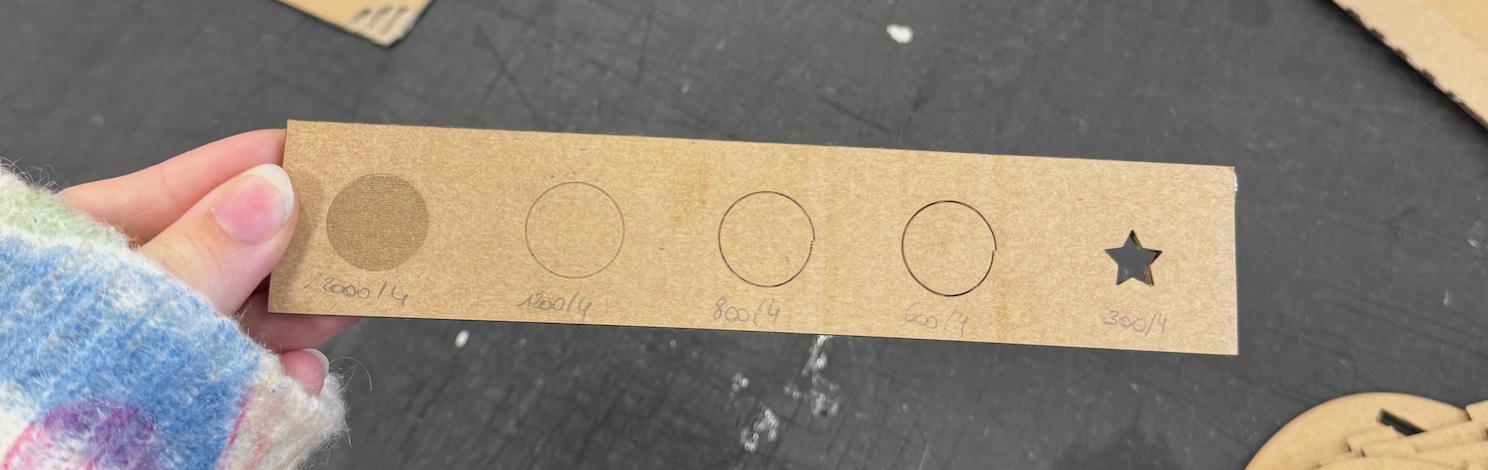
We had some problems with the filling and some colors didn’t appear on the lasesaur app. Since we had no time left, we couldn’t try to recut it.
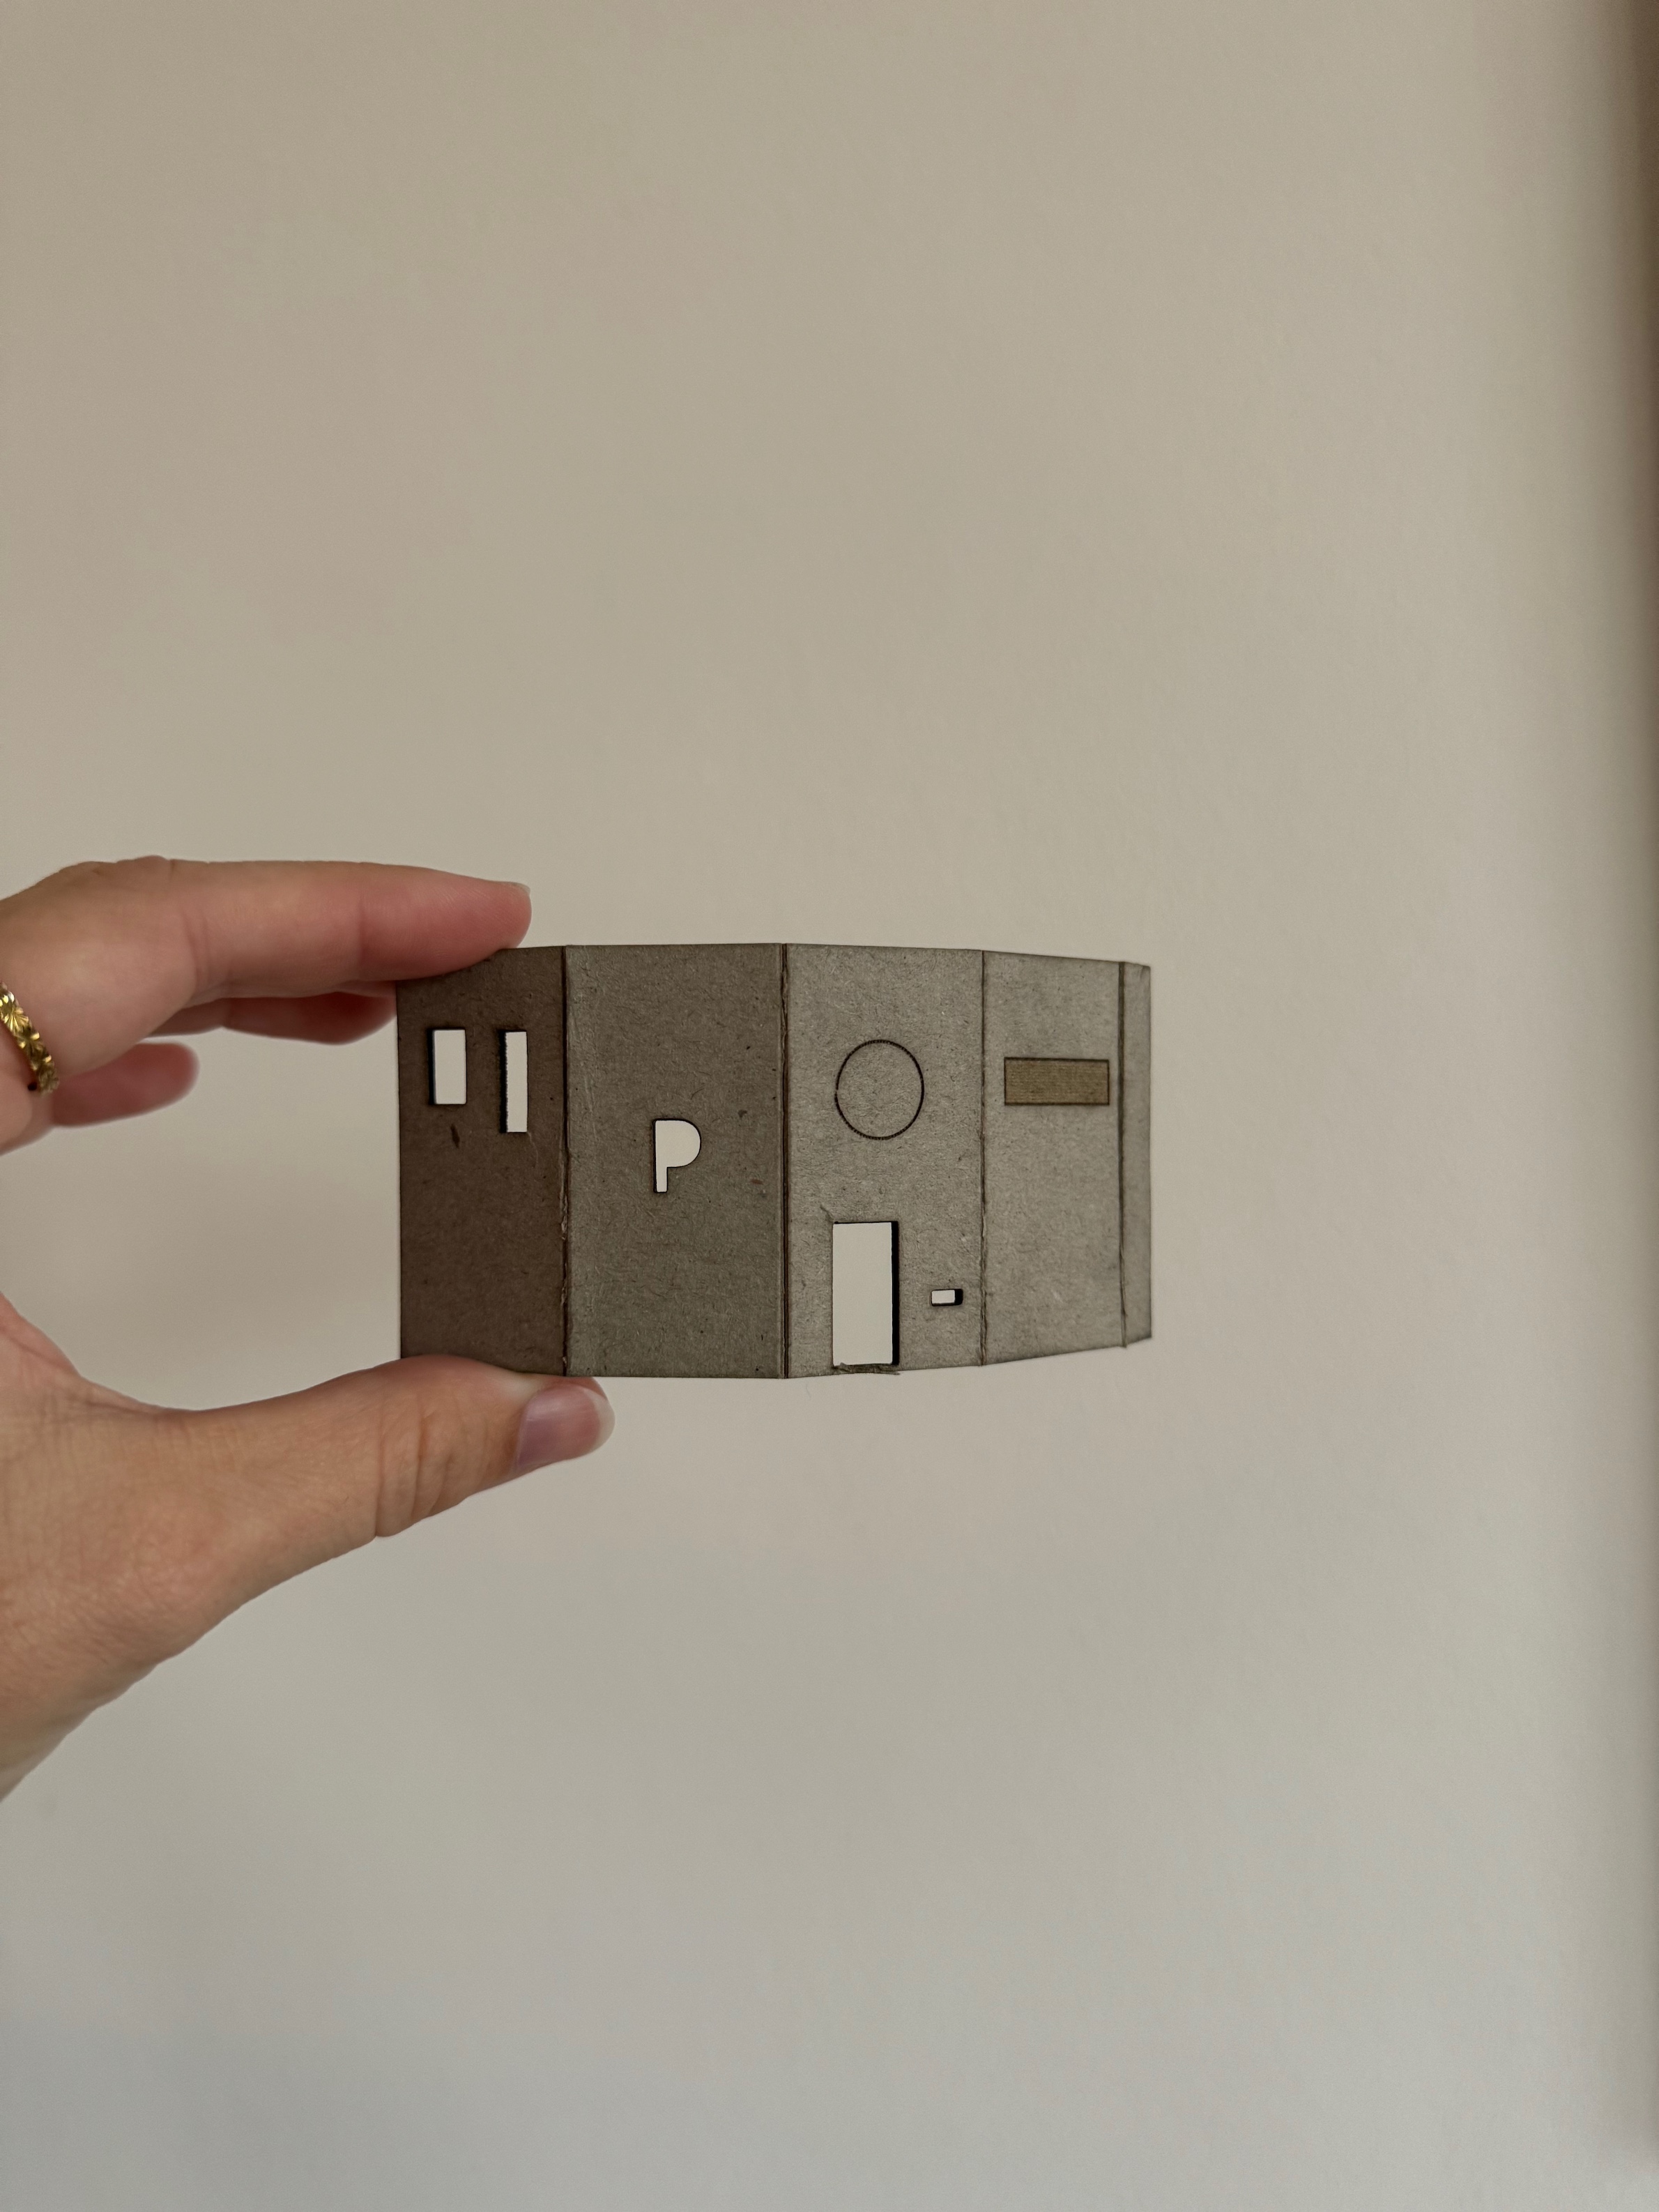
Exercice 3 : construction kit#
First things first, let’s talk about the laser cutter kerf.
What’s that, you may ask?
It’s the tiny bit of material burnt by the laser as it cuts through a material. This means your finished pieces will be slightly smaller than what you originally designed. So if you want your parts to fit together perfectly, you’ve got to take in consederation the kerf in your design.
Then, I took a little trip on the internet and found this cute design :
Here is the file to cut :
I chose one color for every holes.

Once more, there were some problems so I had to select the elephants twice then do ctrl+shift+K.
Here is what I got after laser cutting :
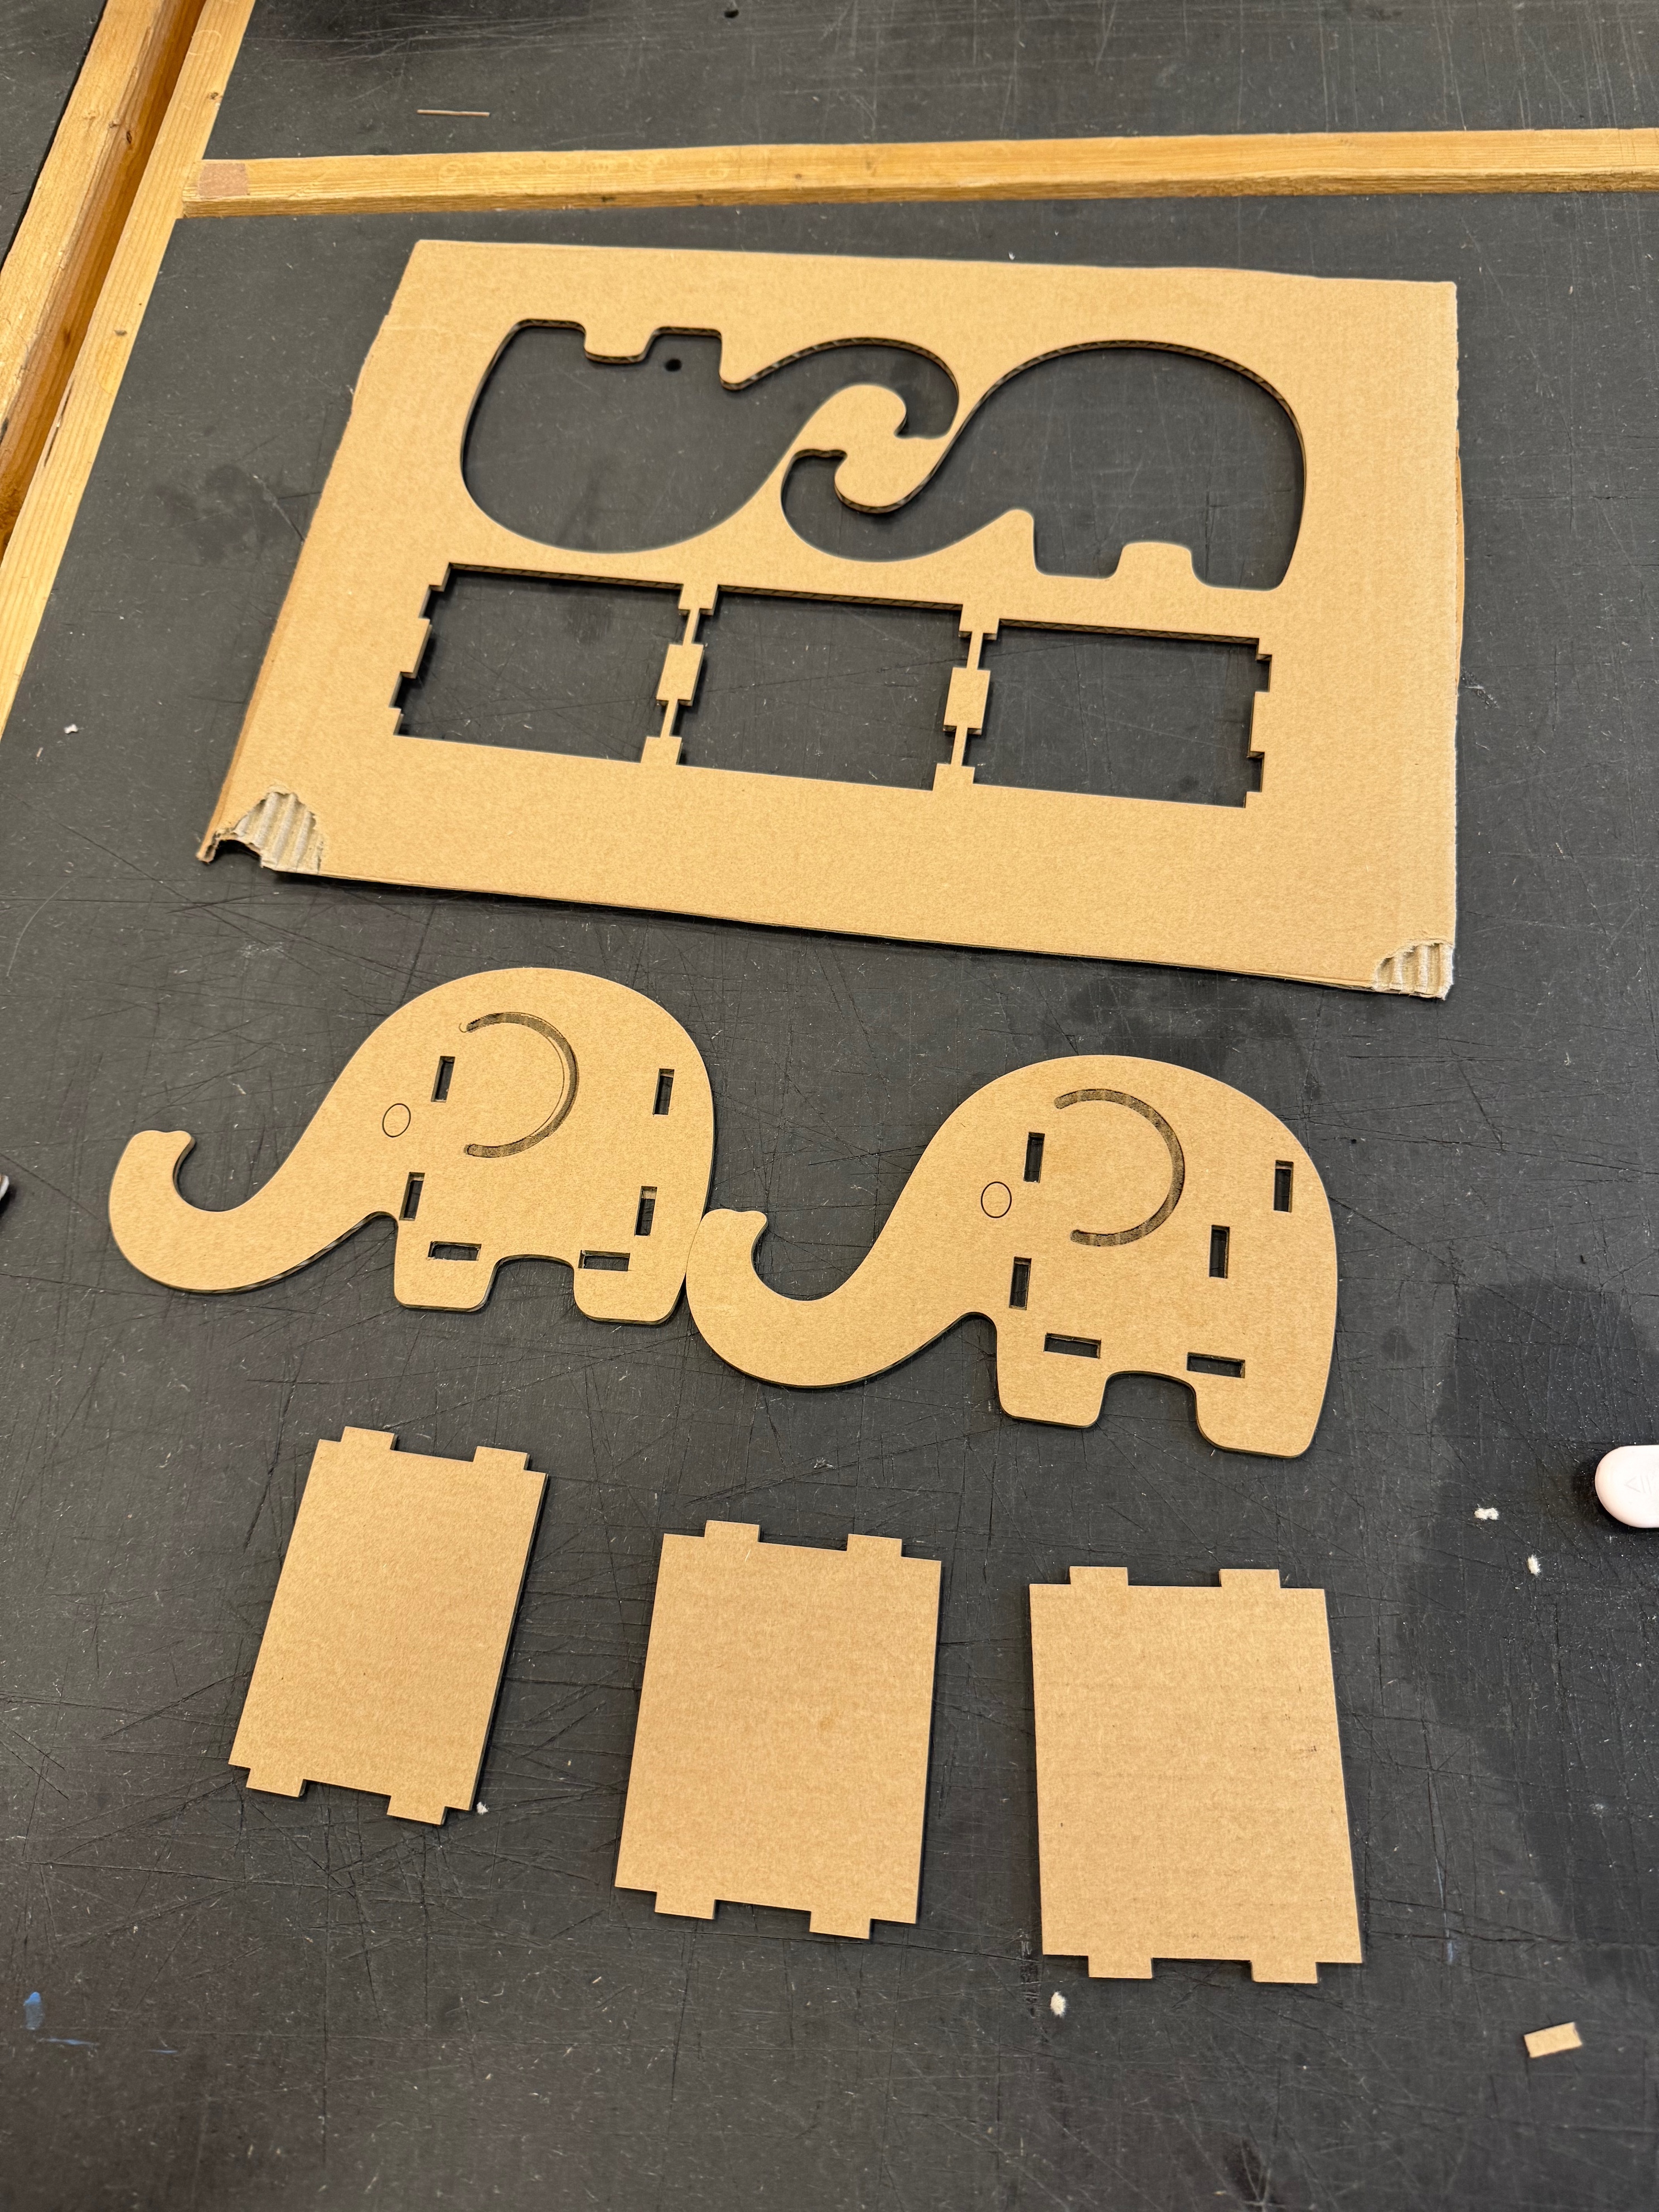
As you can see there were some problems with the holes, they were misaligned but cardboard is forgiving so I fixed it manually with a cutter.
And here is my final project :
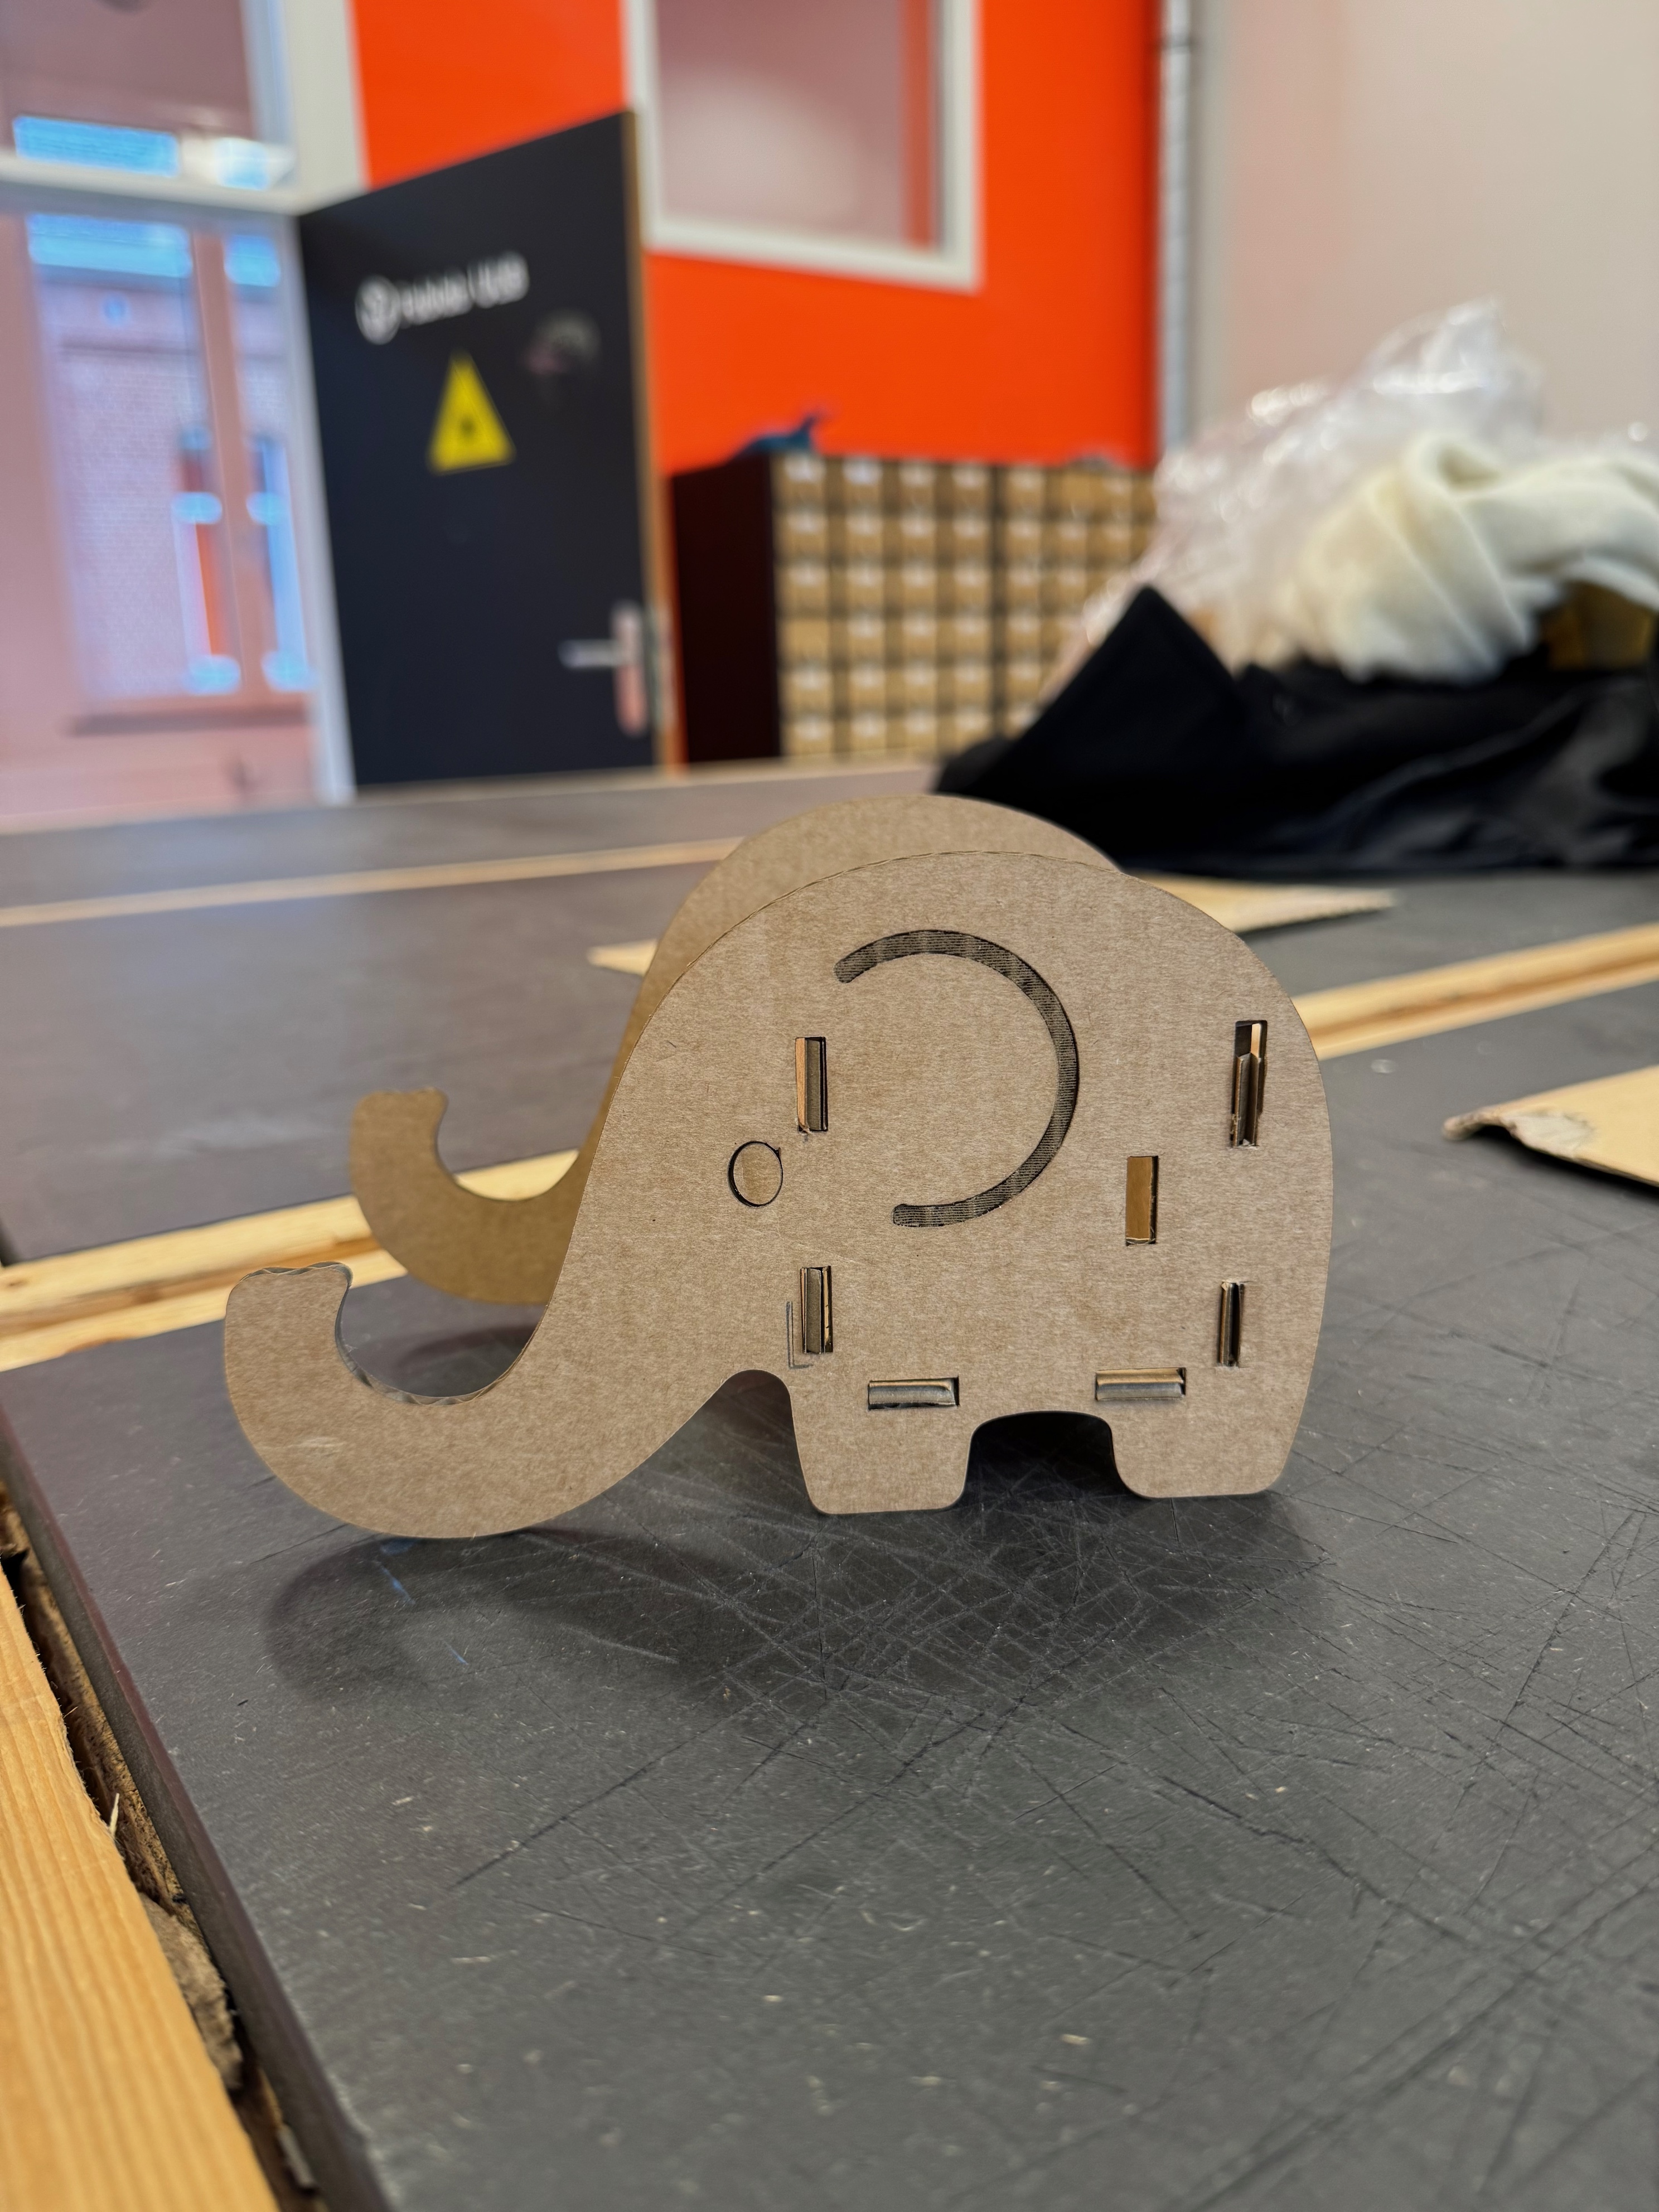
As you might have guessed, laser cutting and I are still figuring out our relationship… let’s just say, there is hope for improvement! ;)
Takeaways#
- 3D printing is great for custom repair
- Laser cutting is fun but takes practice to master
- Every mistake is an opportunity to learn!
So what tool will be next?